Getting started
This tutorial will explain to you how to navigate our platform, how to access certain functionalities, and how to get the most out of Exchange Gate.
You’ll learn steps to fully and successfully use the platform:
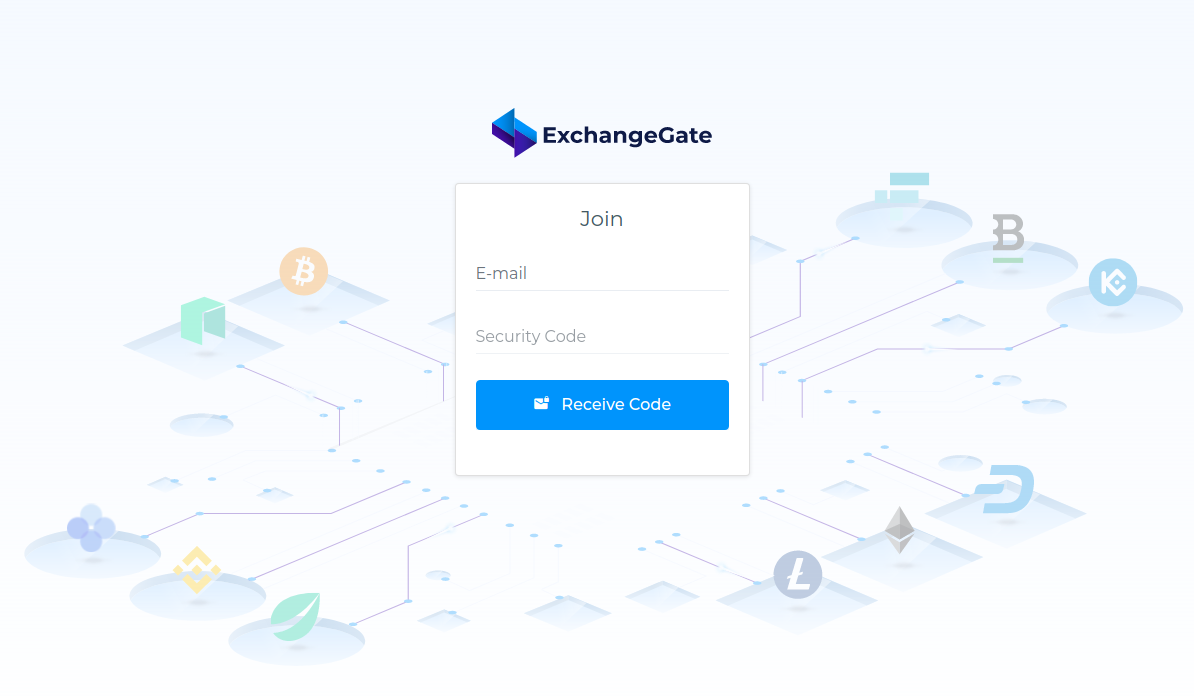
Log in
- Fill in your email and press the button "Receive Code"
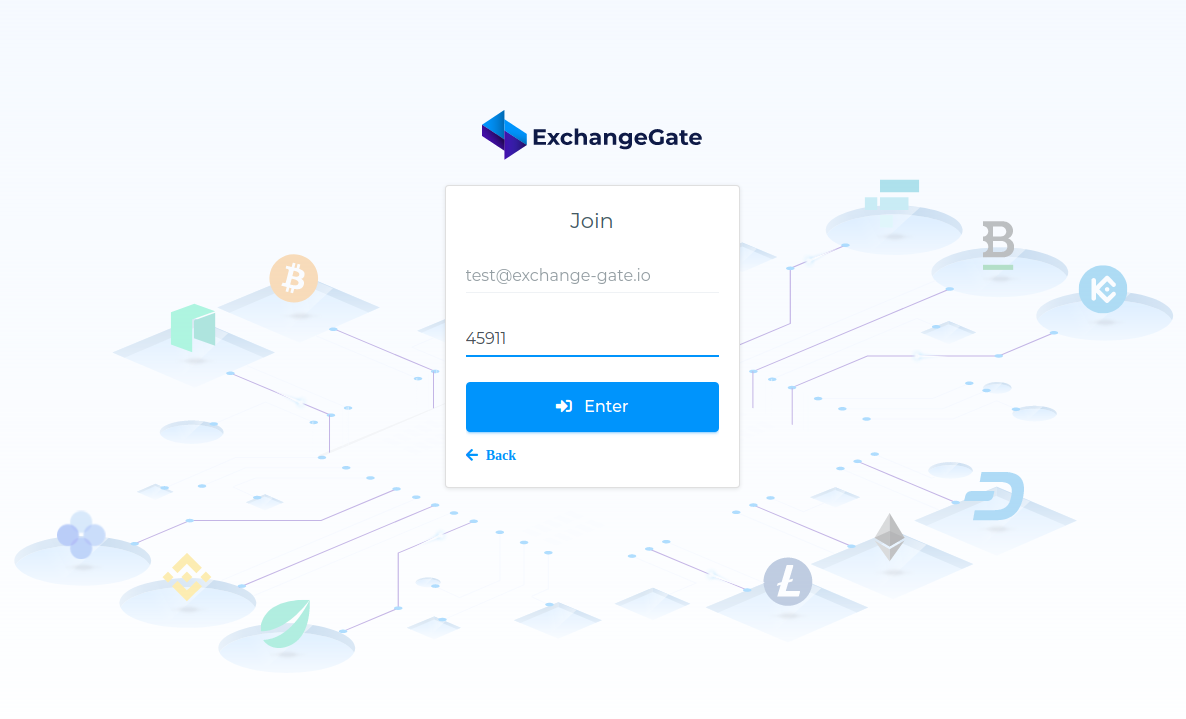
 2. In your email, you will receive a two-factor authentication code. Fill in the code and press the "Enter" button.
if you don't see the code in your inbox,check spam and other folders, or search email from exchange-gate.
Subscriptions
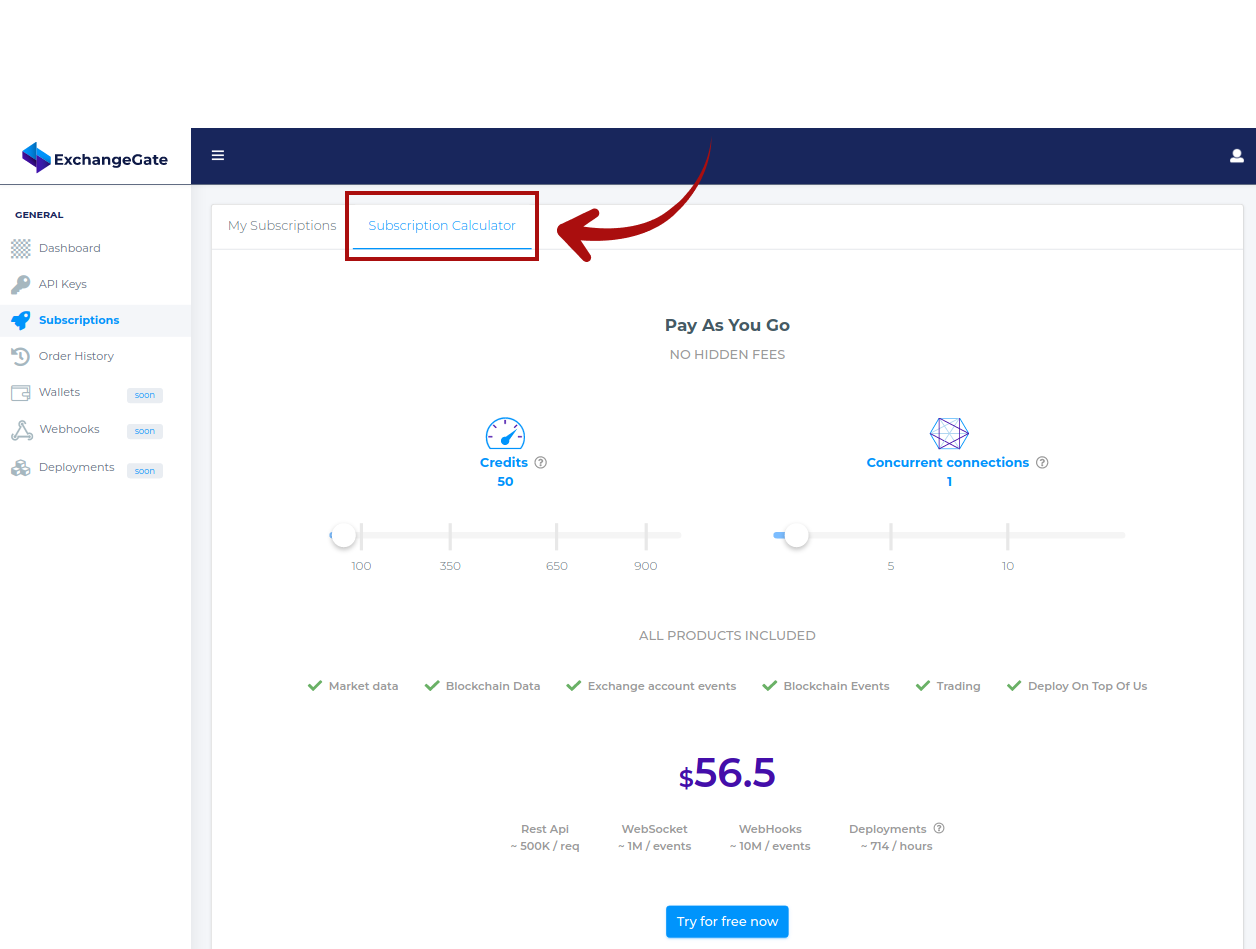
- Go to Subscriptions section and select tab "Subscription Calculator". Here you choose the subscription that suits you and click the "Try for free now" button
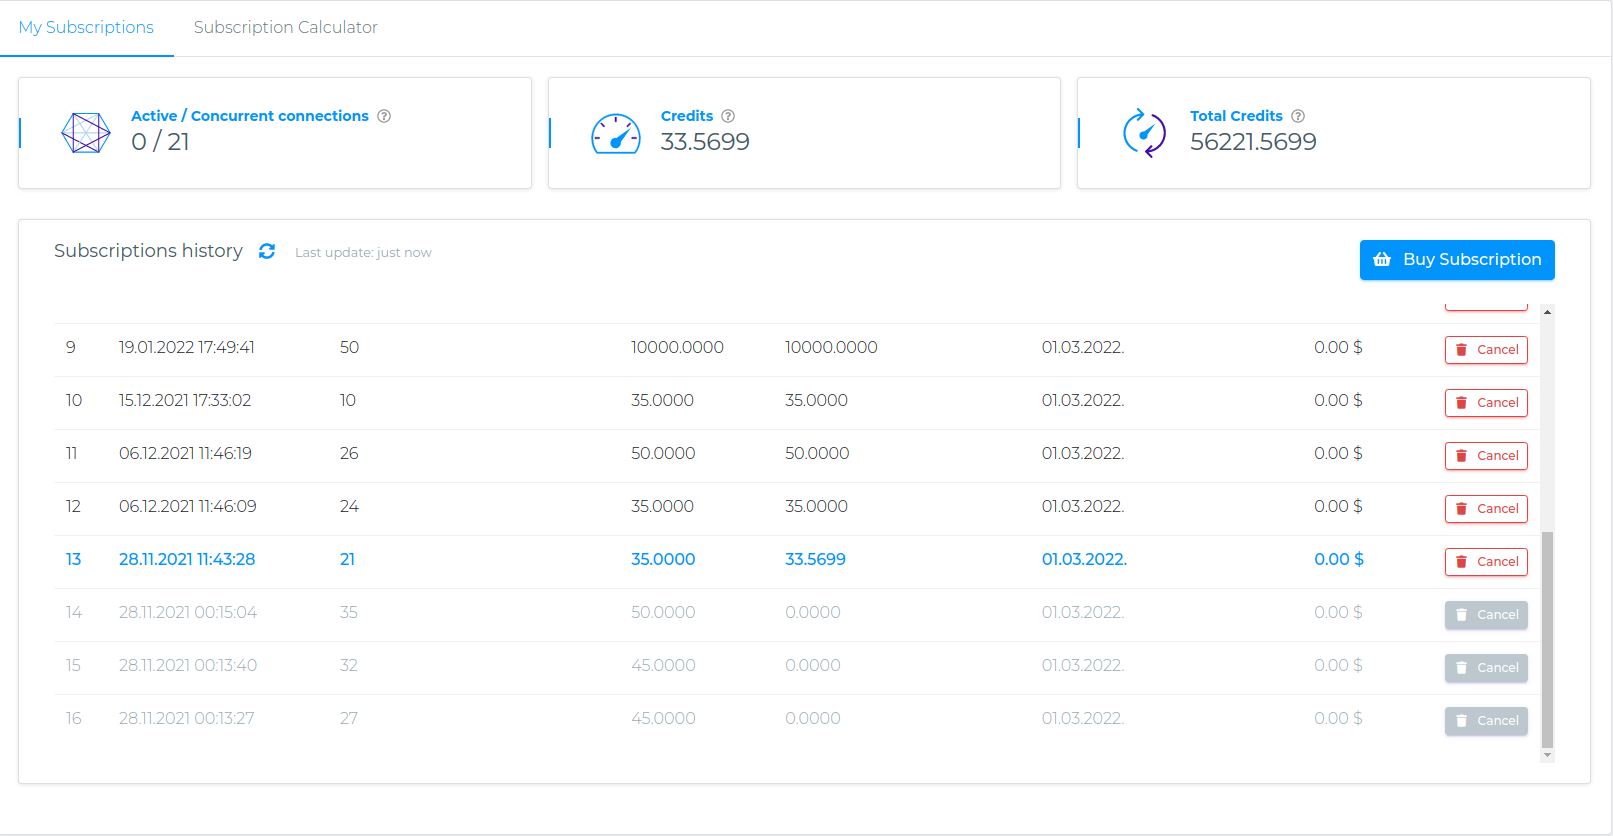
 2. Now go to tab "My subscription" and here you see your newly created subscription as well as its use.
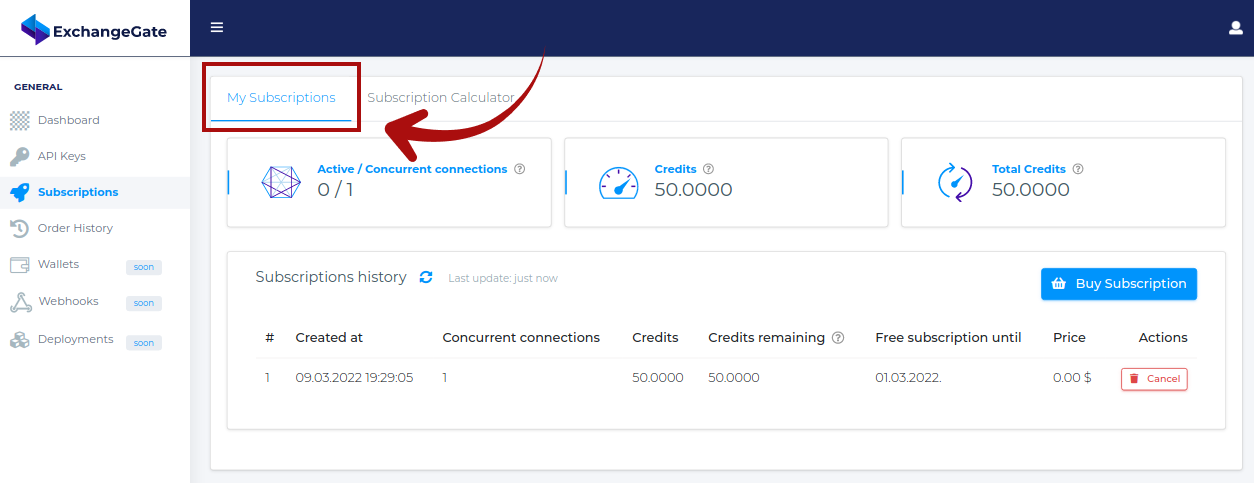 3. Our subscriptions have no expiration date and remain active until they are used up. In the same tab, you'll see a list of all your subscriptions, including those that have already been used, which one is active, and those that have not yet been used.
Api Keys
-
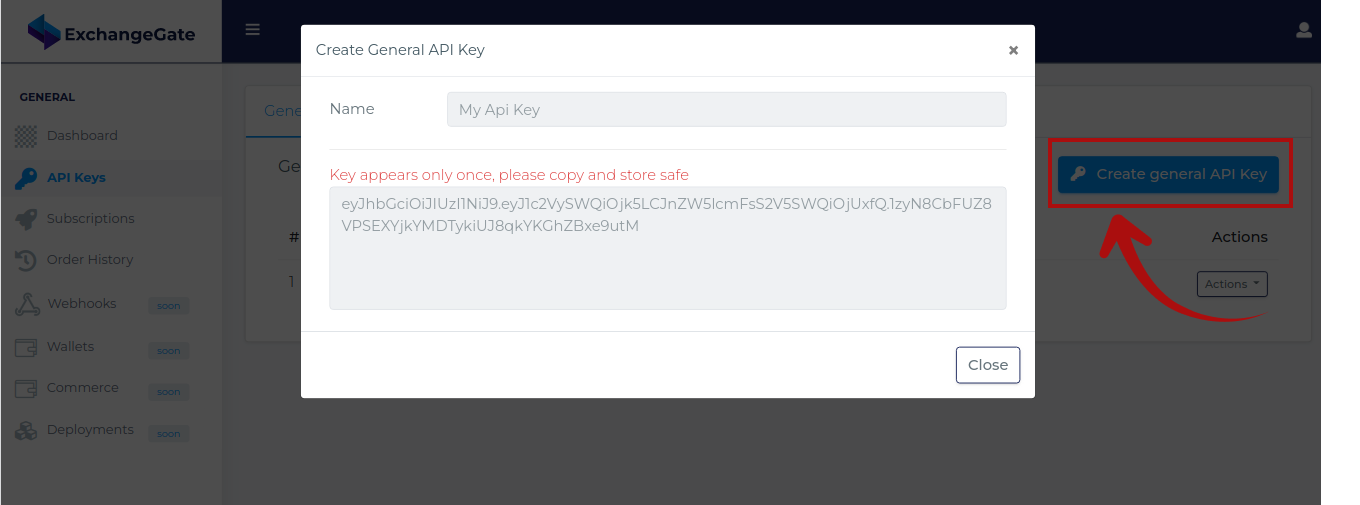
Go to Api Keys section and select tab "General". Create a General API key to connect to Exchange Gate by clicking on the button "Create general API key". Fill the form and click "Create".
-
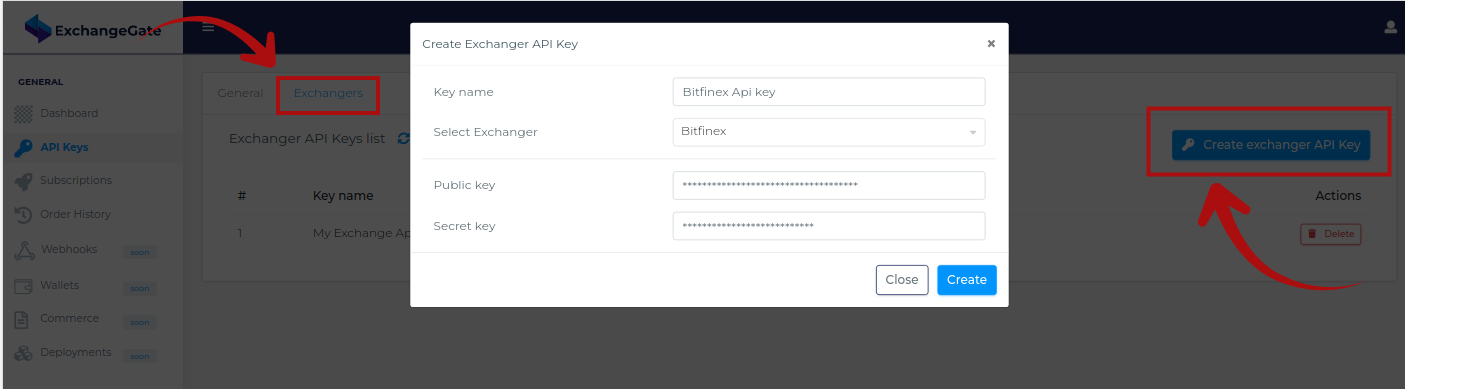
To interact with your exchange account add the exchange API key (If you want to interact only with Exchange Gate - skip this and the next API key steps).
Select tab "Exchangers" and click on the button "Create exchanger API Key". Fill the form and click "Create".
-
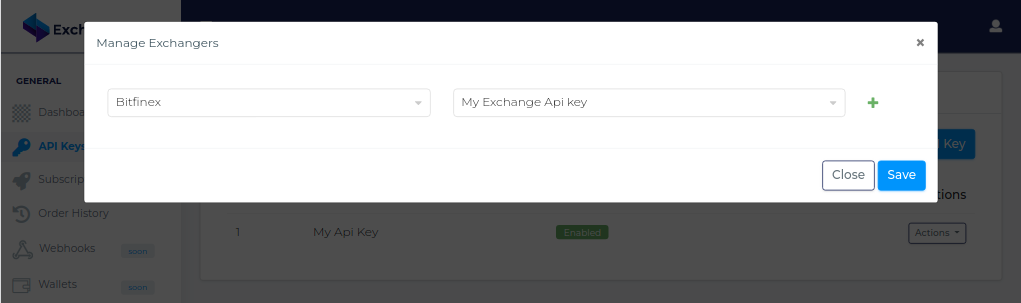
Now go back to tab "General" and add your exchange API key to your general Api key. Click on Actions button and select option "Manage Exchangers"
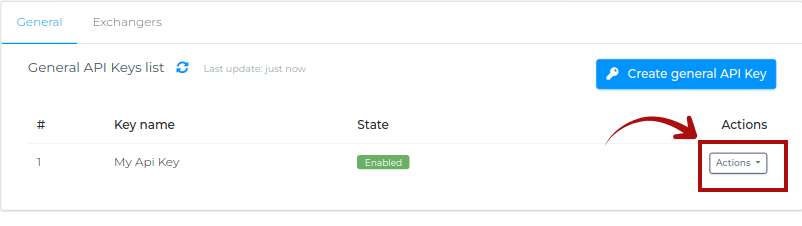
Now select exchanger and your exchange API key and click "Save"
All set and ready for action!
Order History
-
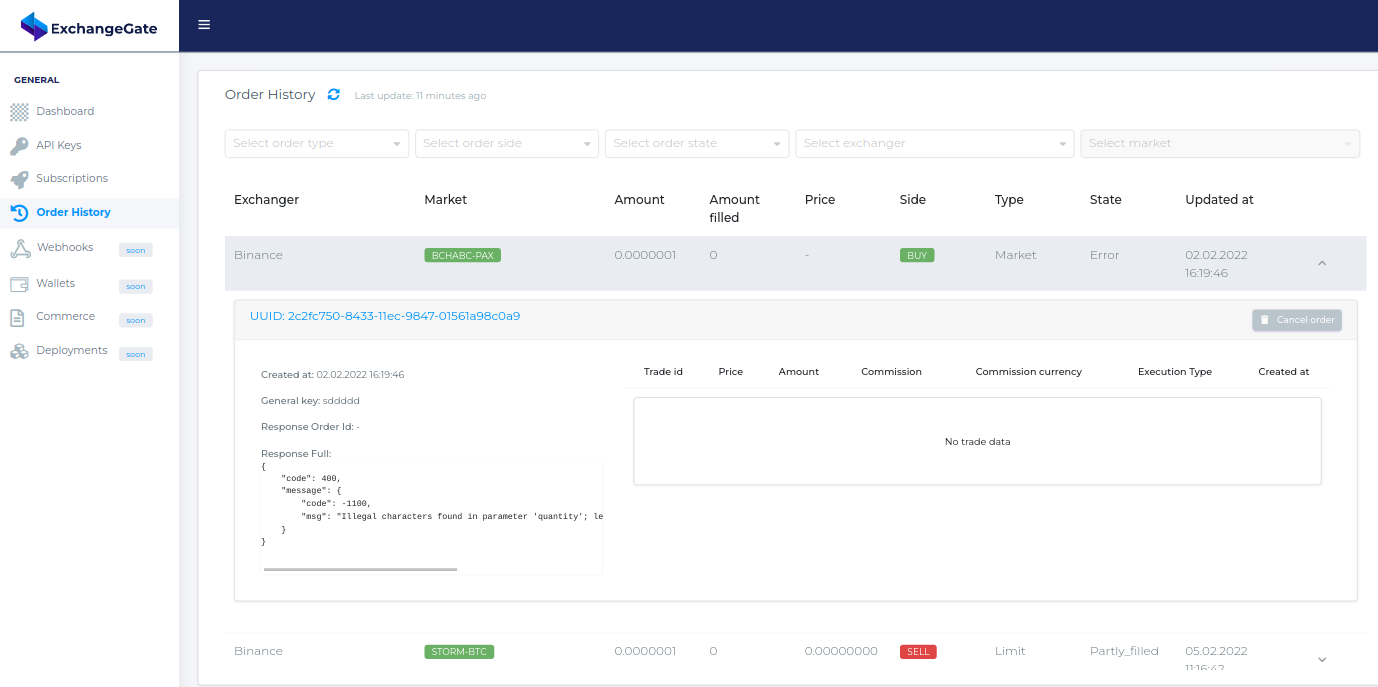
Order History section. Here you can keep track of all current and past orders and their status in the order process. You can cancel active orders, filter list, see the raw response, etc.
Dashboard
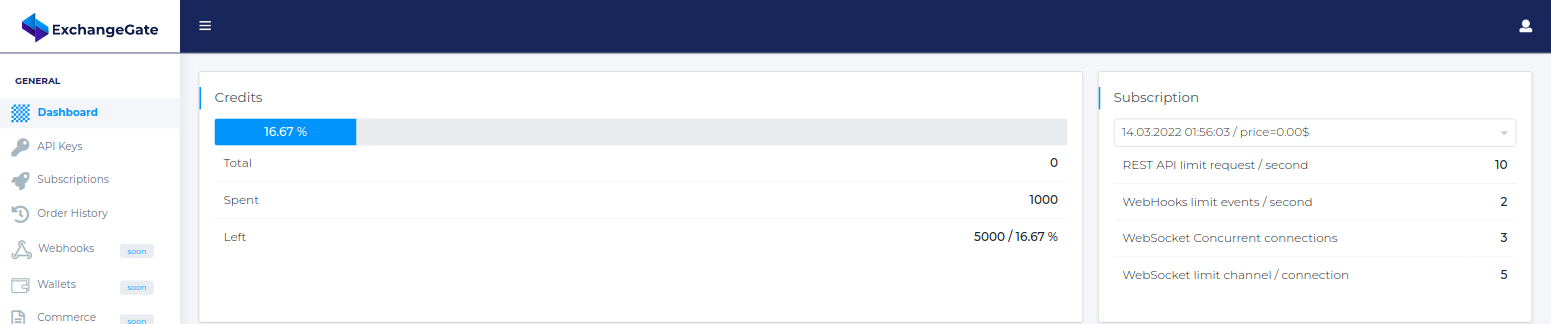
The dashboard gathers the most important information in an easy-to-read way
- The first two blocks contain the most important information about the selected subscription.
In Credits block you can see the credit balance and.
In Subscription block you can choose a subscription (active and historical) for which related all dashboard data and see all related limits.
- Next is forecast for your subscription usage.
This is a forecast for informational purposes only. Calculation based on your current credit balance and usage, assuming you use all of your remaining credit for this position only.
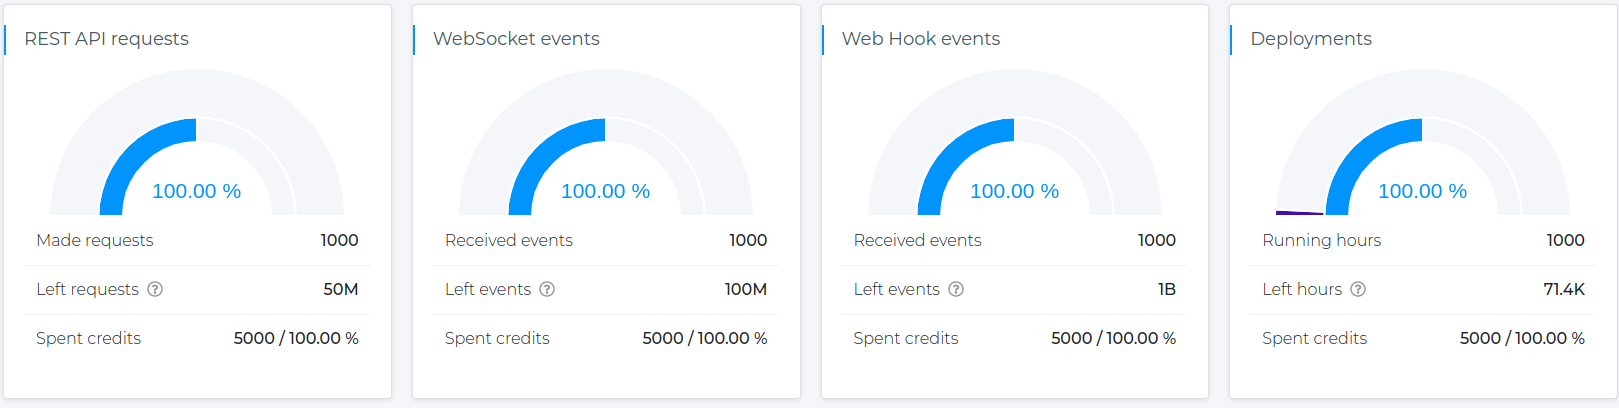
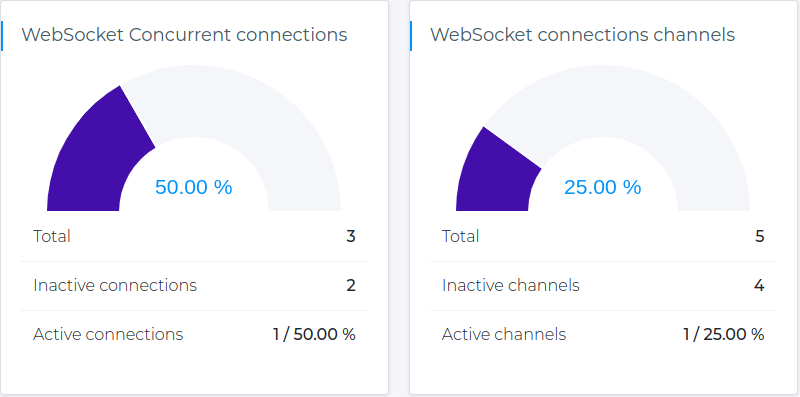
3.These two blocks only applied to the active subscription and indicate the current usage of WebSocket Concurrent connections and WebSocket connections.
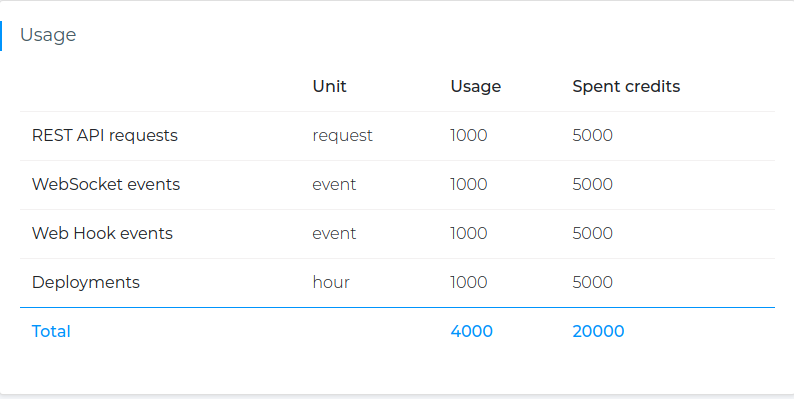
4.Here is a detailed summary of the subscription usability in the table.
Webhooks*
*Coming Soon
Wallets*
*Coming Soon
Commerce*
*Coming Soon
Deployments*
*Coming Soon